Showing posts with label project. Show all posts

Thursday, April 22, 2021

Assembling a teeny tiny 240 page book


Interested in trying your hand at tiny bookbinding or a fan of old French poetry? I’m in love with my mini books and want to share them with you! While I enjoy my fancy cased & trimmed copy this version is very accessible to anyone who is curious. 

Supplies:

  • the text [PDF link via Google Drive]
    • 2 pages, front and back
    • print flipping “on the short side”
    • I print at “HQ 1200 DPI” settings but probably not needed
  • 3 sewing needles 
  • thread (I work with 3 strands of embroidery floss) 
  • scissors
  • T-pin or awl or tapestry needle (for hole punching)
  • Scrap paper (ideally firm, card-stock like) for guides
  • bone folder or some sort of straight edge to help make crisp folds
  • (optional) small rings to make hang-able
  • cover materials (could be easily substituted with chip board or thick cardboard)
    • thin balsa wood
    • balsa wood saw (I normally use this to cut holes in my signatures)
    • tiny drill
    • (optional) ink/stain to fancy that wood up
    • sand paper (100 grit for basic smoothing, 220 if you want to touch it up)

  1. Print Text - make sure it’s flipped “on the short side” -- if you don’t the pages will be “upside down” on the opposite side of the sheet. I scale up to fill printed page, but that’s not needed, it’ll gain you just a little bit of extra room. Be careful not to lose the markings depending on your printer/paper size!
  2. Cut Text - There’s very thin lines dividing each signature row. Cut carefully! Would definitely recommend cutting by hand. Pick one side of the paper and use that as the guide for all your cutting (there may be some skew front/back due to printer variance) 
  3. Fold Signature - there are very tiny marks at the page edges and in the center of a folio. Some markings may have been trimmed off in step 2- don’t worry. Check the top/bottom/front/back for alignment markers. 
    1. There will be very minor overhand on the start/end of each row
    2. Look for the pair of pages with consecutive numbers (should be on the left hand side of the signature. Don’t see it? Turn signature over and check again. These will be the “top” of the zig-zag.
    3. Each “fold” of the zig-zag is 2 tiny pages (a folio)
    4. Make sure you’re checking/enforcing horizontal alignment. Line marks up left-right with the tiny ticks then lightly “pinch” the signature top and bottom around center of folio to make sure it’s level as you crease the fold. Optimize for “level” folds, then optimize for centering the tick-marks.
    5. “Bone down” all your creases after you’re done zig-zag folding (take a bone folder or something with a hard level edge and rub the folds to make them crisp-- just like origami)
    6. Fold folio in half (the consecutive pages should be the center of the fold) and bone down the spine
  4. Punch Holes - in this step you’ll be punching holes in the center fold of each folio. (Normally I cut them with a balsa saw blade but these are too tiny/finicky)
    1. take your scrap paper (junk mail is a great source for this) and cut it to the about the size of a signature. It should be wider than the signature (extend past the folded pages’ edges) but exactly the same height! 
    2. Mark the HEAD and make sure it’s always at the top when punching. Mark & poke 3 holes in it. Center one and then... you know... one above and one below that. Don’t punch them too close to the edge or each other! 
    3. Tuck the guide inside each signature and punch those holes all the way through the signature. I put some scrap cardboard behind it to help but sometimes I just hold it in my hand and punch w/ no backing
  5. Prep Cover - this is where variants can some in- I prefer to sew on a single cord for the necklaces or if I’m putting it in a case but this book is  coptic-like/exposed spine so focusing on that
    1. Figure out your final signature size- how much are you willing to trim off the ends? This depends on how neat your folding/printing went. Make another guide from scrap paper. This should be the same height as the signatures but shorter than the folded pages’ width- it should be the width of what you want the final page to be.
    2. Using the guide, cut out your covers to that exact size (error larger). Balsa wood & saw wasn’t instantaneous but totally doable. Just be patient (< 5min of sawing?) 
    3. Drill holes (or punch if you can) at the correct heights (use initial guide you made). Two holes per signature hole are required- put them near the edge/near each other but no so close that your material will split/crack/be weak. Use best judgement. 
    4. (optional/hindsight) I didn’t do this, but if you can-- put a small divot at the furthest-from-spine hole on the inside for the knot to rest in.
    5. (optional) stain/color/paint/decorate your cover
  6. Start Sewing - select your thread. You need 3 needles, threaded with the same amount of floss. To calculate use the formula “height of signatures” x “number of signatures + 1″ - for this sewing there’s already extra built into that. The next steps need be applied to each of the 3 signature rows
    1. Put a knot at the end of the thread and run it through the back cover in the furthest-from-spine hole, going from “inside” to “outside” of cover.
    2. Loop back and come in from the closest-to-spine hole, going from “outside” to “inside” of cover.
    3. Make a loop, you’re going to need to keep this loose and will tighten it later. Exit the same hole you just came through, going from “inside” to “outside” (if you pull too hard, the loop will just pop out and you’ll have to go back to step 6.2).
    4. From the “outside” of the cover, bring the needle around the spine-edge of the cover and go through the loop you just made.
    5. Tighten everything.
    6. You are now read to sew signatures 
  7. Sew a Signature - each signature is the same until you reach the front cover
    1. Trim left & right edge of signature using the guide you made in step 5.1 using scissors (you’re cutting through 5 sheets in one go- hard but not impossible). This separates all the pages and is done at the last moment to try and make things easy for sewing. You could do this after assembling the book if you’d like.
    2. Run all the needles through the holes they correspond to going from outside of signature to inside of signature.
    3. Each needle exists the signature in the following order. This requires tension (the signature should be flush against the text block) and precision. High dexterity step, see photo above for advice on how to hold it.
      1. Top thread goes out through middle hole
      2. Middle thread goes out through bottom hole
      3. Bottom thread goes out through top hole
    4. Tighten all the threads, make sure it’s snug, and then bone down the spine again as best you can now that it’s part of the text block
    5. (optional) If you wanted to add rings, sew them in between signatures 5-6, 6-7, and 7-8. 
    6. (optional/hindsight) I forgot to “kettle” my stitches- you could do so here if you know how but I’m not going into details
  8. Finish / Cover - the short of it is “do everything you did in step 6, but backwards”. Each thread is finished the same way:
    1. go from the “outside” to the “inside” of the closest-to-spine hole on the front cover
    2. loop around the thread going from the signature to the cover
    3. go back out the same hole you just came in through ( “inside” to “outside” of cover )
    4. Come in through the furthest-from-spine hole ( “outside” to “inside” of cover )
    5. Nudge and jostle everything so that it’s as tight as possible
    6. Tie a knot & cut the thread! (wait to do this step on all the threads at the same time)


You’re done! 

Sunday, March 6, 2016

Small magnetic single throw double pole circuit

Back when I was a wee lass I saw Jurassic Park and knew then I wanted to get into computers so that I could create special effects. When I was a bit older we were visiting San Francisco and I went on an Aliens themed "3D" ride around Fisherman's Wharf (or maybe it was in Seattle?) Anyway, I remember being blown away by the experience of the seats moving and air hissing and decided I wanted to do computer stuff that would effect the real world. Fast forward a couple more years and I was at UW, majoring in Computer Engineering with a focus on embedded systems. Fast forward a few more after that and I'm a web dev tinkering with JavaScript... whoops. Might have miss-stepped somewhere along the way... but my love of computers is sound.

I have an inkling of knowledge on how to do things In The Real World but it's pretty weak. Turns out EE is hard and intimidating. But my interest remains strong. This, combined with my experiences doing several Escape Room games and the delight I had playing in a friend's Harry Potter puzzle LARP has lead me to the obvious conclusion that I should organize my own escape game.

Settling in to craft

Happily we got a lot of rain this weekend here in San Francisco. Not only does it help the drought problem, it allowed me to stay inside most of the weekend coding and crafting. And boy howdy is there a lot of coding and crafting to be done for this project.

A majority of the project is computer systems/pure code which I've been chipping away at, but some elements are hardware related and I've certainly been avoiding working on them. I enjoy it! But... it's hard. Thankfully I made actual progress on one portion but also wound up scrapping a different portion after repeated failure. Lets focus on the positive though!

If there's a chance you'll be playing in the game (you know who you might be, my so few Readers), I'd recommend not reading the rest of this post.

Not even half of what I needed Failed ideas

The goal: Have a surface that players can place an object on. The object has several magnets embedded in it, which activate switches below the surface when aligned correctly. The switches are attached to an Arduino which informs the computer, which informs the game server, which then has an effect on the game.

Turns out the end portion of it- the Arduino talking to the server is suuuuuper easy given the pySerial library. So the question here is about the circuit. Magnetic switches in a small space. Not difficult, right?

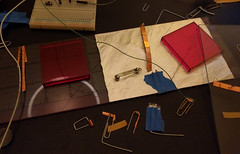
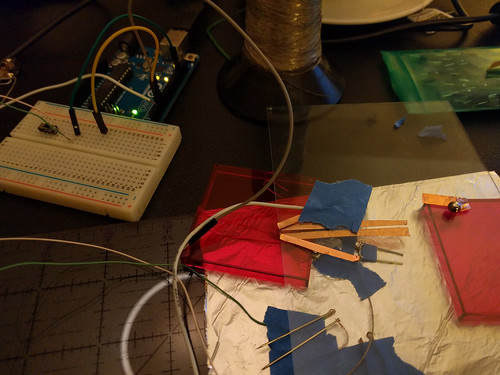
First attempt: run a wire to a bent paperclip, tape the wire to the hidden "floor" below, and use the wire as a hinge. Have the "surface" above be wrapped in tin foil and ground that. Now the wire runs to an Arduino pin in `INPUT_PULLUP` mode. Boom! Done! Success! When the magnet moves above the paperclip, the paperclip jumps up and grounds itself against the "surface" above and you've got a closed circuit!

Problem: There's only a couple pins on the Arduino and I'd like there be be a number of sensors so that different configurations can be recorded. That means each sensor circuit needs to ground 2 pins so I can have more unique combinations (That's multiplexing... right? Maybe?)

Next attempt: ... somehow close 2 circuits with a single paperclip's movement rather than just 1 circuit.

Problem(s): The paperclips I bent all had a single point of contact where the magnet was. The wire hinge was a bit too ridged/constricting to allow smaller pieces to rise and fall. I tried many different shapes and sizes and padding/fringe along the top of the paperclip that contacted the surface above. The signal was finicky, rarely closing both circuits.

Not really "success," but acceptable

eventually... "success!" (the signal is still a bit finicky, but good enough to go forward for now)

The solution? Have lots and lots of craft items laying around your house... No, really. The solution? conductive thread & copper tape

Conductive Thread : something needs to hold the paperclip to the "floor", allow it to pivot, and make sure it's connected to the circuit. Wire hinges were proving to be too ridged along with folded tape or aluminum foil. Enter the ever magical conductive thread. Taking two strands and tying them to the paper clip solved this problem. The clip was bent to be flat along the bottom, one strand tied to each corner, then the strands taped down with masking tape. It was a smooth hinge and a reliable connection. I wrapped the floor with aluminum foil and grounded it so that each paper clip is grounded via it's conductive thread tie downs.

Copper Tape : originally acquired for stained glass purposes, it's great. One side sticky, one side copper & conductive. Note that the sticky side is not conductive (sadly). I used this to mark out the traces on the bottom of the surface, where the paperclip would connect to. The tape is already pretty thin but I was able to cut it in half and place very close to each other- like laying out a sticker circuit board. I cut the paperclip to be U shaped, anchoring it to the floor at the bottom of the U. Now when the clip jumps up towards the magnet and closes the circuit, it has 2 little points contacting the 2 different traces (rather than one broad one).

Wednesday, January 27, 2016

Gaming Craft

I like gaming. The social aspect is fun, yes, and story telling, but it's this whole crafting/art project portion that really hooks me.

As I've aged I'm finding it a little harder to just make things willy nilly without thought as to why or for what purpose. I've tucked about as many little monsters about the house as Adam will let me. I've given ones to many friends and all family members. Why make more things? Well, making things is FUN! But... why? That's where gaming comes in. Now I'm making not just "something" but rather a prop or an accessory. A visual aid for something that involves more people than just me. Purpose.

D & D : Prep is fun

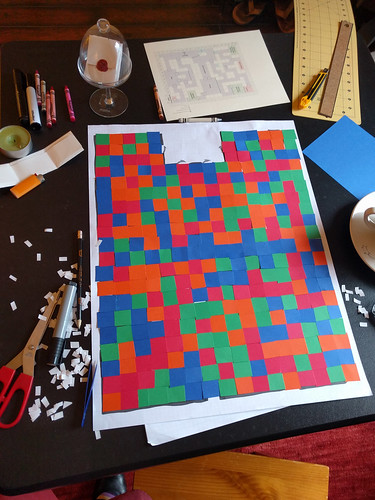
Up until this point I've mostly been playing in games but 2016 is the year I dip my toe in trying to run them. Picked up the D&D 5e suite of books/rules and have run 2 little one-shot games for my friends. Wouldn't say they've been that successful but I've definitely enjoyed having friends over and having an excuse to think creatively. The first game involved a 2 level map where I drew the ground on graph paper and then had a tree branch level drawn with dry erase markers on a glass shelf (resting on several cardboard tube tree trunks). The second involved a dungeon map slowly revealed as people explored it.

D & D : ready for that dungeon crawl

Turns out peeling off square by painful square of "fog of war" isn't super fun. Also, candy colored "fog of war" really doesn't add to the "dungeon crawl" vibe... The problem wasn't the taping down (that actually worked super well) but just the general scrabbling for a hold on tiny paper piece in order to pick up. One takeaway from it though was that drawing the map was a good exercise in thinking about the story and helping me build out an idea. Drawing is my best way of building a narrative- something I've known for a while.

Rogue Trader : Homework

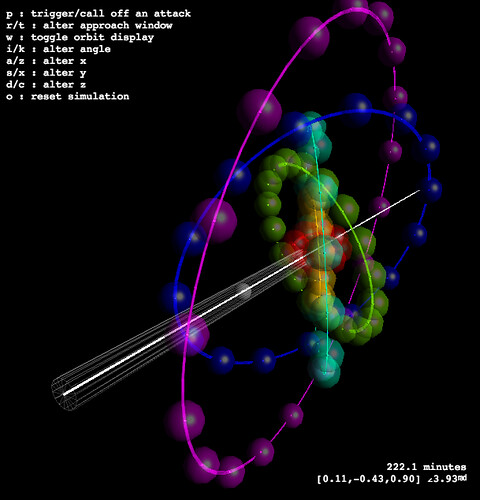
Another delightful gaming craft recently worked on was the Rogue Trader Yu'Vath Battlestation Assault Plan. Given a rather math-y description of a patrolling ships around a point of interest, friend Nate and I wrote a little simulator to help find the best approach. Mind you, this is for a game I'm not even in. Was thrilled to have a valid reason to use the three.js library again and limber up my mind, wrapping it around 3D math/space/modeling. Not sure how long Nate will host it for, but the simulation is up at this site right now. [code posted on Github]

Monsterhearts : The PCs
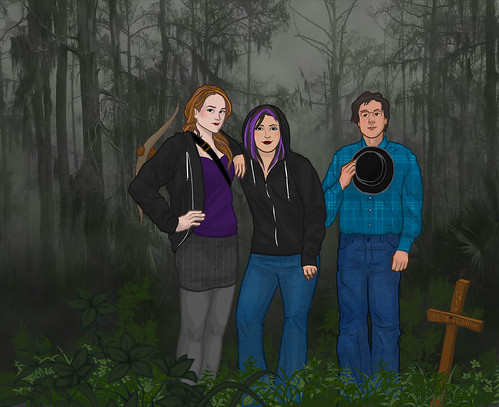
While not really a craft, I've found games (mine but especially others') to be an excellent source of sketching and art. Friend Kelly drew the characters from a game and then flattered me by asking to help with inking/coloring it. I appreciate that with her effort/interest/involvement I managed to overcome the wall of white space most my sketches hang in and provide the vaguest of something for background (drawing backgrounds being my majorly failed 2015 New Years resolution). Never mind the fact that it's mostly a munged photo I found on the Internet...

I was going to follow this up with several more gaming sketches but alas this week's plot didn't get far enough...

Named arrows fly better

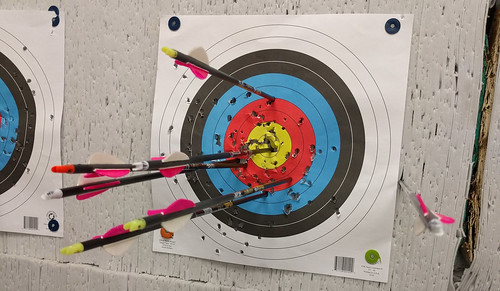
Along the gaming craft tangent: applying game content to other activities. Friend Suko and I continue our once-a-month shooting. I've marked my arrows with names of 4th Terminus characters and not only does it help me improve my aim/track my shot history but it also tells a story with every round. "Oh Hayley, once again going off target. Morgan, always flies true. Jayce, right where I send him and look at that- the Jaya arrow is snug up against him. Again." What I need to do now is figure out a better way to label the arrows. Right now I've scribbled the names on the nocks (over half of which need to be re-aligned) but the ink rubs off so easily there.... Anyway, the important take away is that once I named my arrows and could track which offset/corrections were needed for each I was able to hit the bullseye three times with the arrow named Jaya. Just saying. The other arrows need to start pulling their weight.

In conclusion gaming is fun. Friends are great, telling stories with them is a fantastic way to pass the time, and using said content to overlay on other actives makes everything better.


Saturday, October 3, 2015

Winding down

So I'm fast approaching the 3 month mark of being unemployed and things are winding down here. I've already begun the process of finding new work- have applied to a number of places already. Am targeting Nov. 9th for a start date. Fingers crossed that I can a company that both interests me and wants to hire me. Am never able to escape that Woody Allen joke "I'd never join a club that would allow a person like me to become a member" in terms of work though...

Yet another sunset photo

In terms of the things winding down: I'm excited that most my projects/goals/objectives of this hiatus have been met or are very near the finish line. Other than claiming I was going to do TWO quilts rather than just one (because I'm an idiot), I feel I've done an excellent job of scaling my ambitions to my expected available time. The quilt is essentially done, just needs some more superfluous stitching and a wash. The books are going to be finished come hell or high water. I've learned to cook chicken a number of ways (some of them even fast and easy!) and feel rather confident I could prepare a "meal" on the fly now after work without excessive stress or research. I've got 3 branch libraries to hit and then I'll have tackled 'em all. I had an excellent run of 5+ mile a' days there and don't feel guilty or bad that I've slipped back down to a steady 3 miles a day because I want to, you know, DO THINGS during the day and walking takes a hella' lot more time than initially anticipated.


(I dehydrated a hard boiled egg. I DO NOT ADVISE IT)

I guess the main let-down of this whole extended vacation was I failed to advance my drawing skills. I had hoped to tackle landscapes and I've made not a pinch of progress on that these 3 months (or past 10 even- it was one of my few resolutions this year). I also failed to attend any sort of fitness bootcamp nonsense thing, which I never really seriously considered but had always faintly hoped I'd do given sufficient free time. Maybe three months just wasn't "sufficient" enough, 6+ months off and I'm sure I'd get around to it...

In terms of other, just general awesome things:

  • Saw the whole blood moon eclipse thing. Happiness.
  • Went to the SF Super Hero Street Fair with company. Had a drink even! Danced with Santa. Was swept off my feet by random silver spandex man and made very happy. Good times.
  • Finally took another stab at hard crack sugar. It went better this time. I am emboldened.
  • Suko and I have not yet abandoned archery. This makes me proud of us.
  • I got a calligraphic letter from Katie in the mail, and it wasn't even a reply to something I'd sent. Just outa' the blue. So nice!
  • Enjoyed opening weekend at the Petaluma corn maze. Highly recommend it.

  • Monday, August 24, 2015

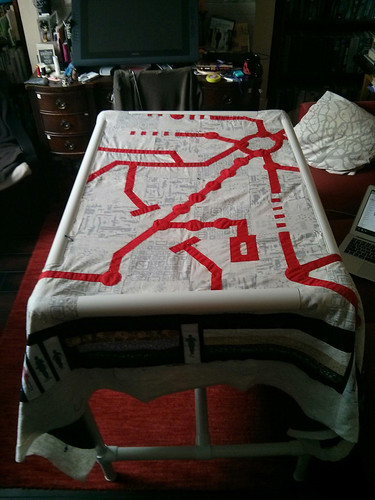
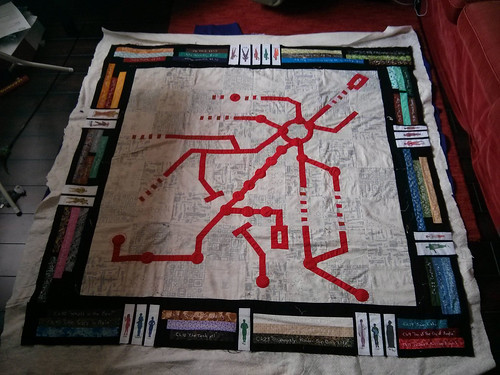
    4th Terminus Quilt aka Decision Fatigue

    While snapshots of quilt progress have littered my Tumblr and it pops up frequently in conversations about what I'm doing, I apparently failed to blog about it here. Given that I finally started the quilting part this last week, I figure now's a good time to do so.

    Quilt Sandwich!

    The project has been percolating in my brain for a while, not sure exactly how long. There were many motivators/reasons behind it:

    • I was on the prowl for a new quilt project. I apparently need a very personal, focused reason to work on one (the Scrabble Board quilt and Pythagorean Theorem quilt remain unfinished- not abandoned but decidedly low low low priority)
    • Nate said the game was going to end this year and I thought it was worth commemorating
    • I've known about Spoonflower since 2008 and have just been waiting for the perfect project to come along so that I could try them out
    • I love generating artwork for the games I play
    • I've long desired to have more practice/reason to embroider phrases. My font is kinda' ugly, but whatever. Still learning, practice makes perfect.

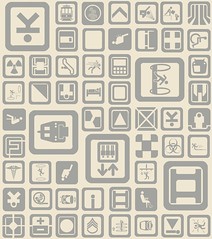
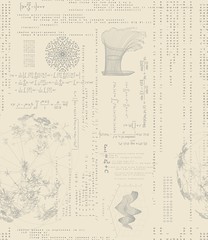
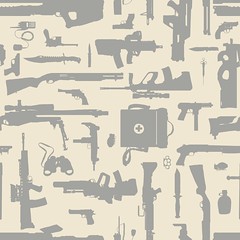
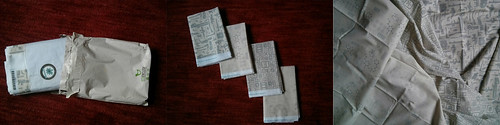
    Iconography Print Medical Print Science Print Gun Print

    Looking back over posts and emails, the timeline looks approximately like this:

    • Late 2014, I get it into my head to do a 4T quilt featuring the transit map and the character silhouettes I've drawn
    • Jan 21st 2015, pestered Nate till we got a revised/blessed/final take on the transit map. Posted to Tumblr.
    • Early February 2015, pulled both Suko & Nate into the project for feedback/input. Good decision.
    • Late March 2015, started designing first pair of custom prints. Posted to Tumblr
    • Mid April 2015, designed final pair of prints.
    • Late April 2015, decided to undertake the task of embroidering every chapter title for boarder. Posted to Tumblr.
    • May 3rd 2015, first test yard of fabric arrives. So strange to see digital content brought into reality. Posted to Tumblr.
    • May 28th 2015, bulk fabric order arrives! So much pretty, all of my choosing! Posted to Tumblr.
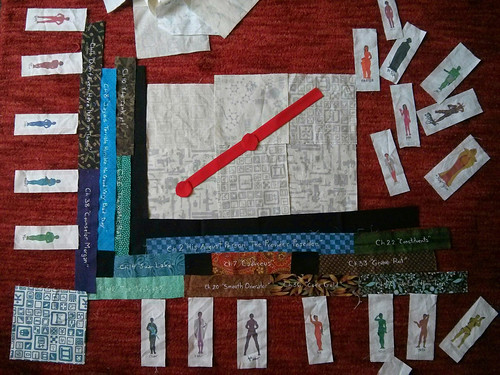
    • May 31st 2015, cut and sewed the blocks together. Then settled into the long slog of embroidering all the chapter titles. Posted to Tumblr.
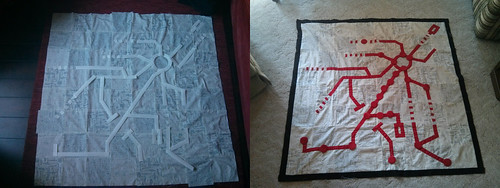
    • July 29th, 2015, buckled down and did pile of work, most notably sewing down the transit line. Posted to Tumblr.
    • August 21st 2015, finished back, slapped some batting between the piece, and started quilting! Verified that, yes, my stupid bulky quilting frame is actually exceptionally awesome/useful. Posted to Tumblr.

    So exciting!

    It has been a fun and educational process. It also has been extremely exhausting. Every fucking step along the way has been a decision point. Which fabric color to pair with each chapter title? Which color tones to use for the prints so they are visible but not too attention-grabbing? Which shade of red? Which shade of purple? How wide to make the lines? Which characters will stand next to each other? Which chapter titles will surround them?

    See the idea come together

    This number of decisions and their continuous nature (as opposed to all being resolved at the start) differs greatly from my (admittedly little) quilting experience so far. Now that I'm onto the quilting bit, it feels as if a weight has been lifted. There are very few decisions left. Before me now is just the clear, uncomplicated work of stitching along lines that I have already decided upon. I remain happy, but am glad to have finally clear the worst of it.

    Making it happen

    The take aways from the project so far:

    • Let it go. Just decide on something. Something is better than nothing.
    • Spoonflower is great! Higher contrast produces better results.
    • Wash away fabric pens were kinda' a let down. Wound up using mostly white charcoal art pencil to outline most my text
    • Rotary cutters FTW. We already knew that. Never hurts to repeat great advice though. I finally upgraded to a super-large cutting mat. I feel like a grownup.
    • Always buy more solid colored fabric than they think you'll need. It never hurts to have too much and it hurts A LOT to not have enough.
    • I don't like the long-stitch/split stitch font I chose for my chapter titles. Next time I want a smaller back stitch for my text. (something to keep in mind for the Pythagorean Theorem quilt)
    • I invested in those plasic perfect circles for my station dot applique. No regrets. They didn't turn out perfect, but that's my fault I think. Next time I need a smaller running stitch when basting around the edge, for the gather.
    • Adam is a good sport for letting me litter so many craft supplies about the house for this, for so long. The drying rack has been in the TV room for several months now with the chapter titles and fabric prints draped over it.
    • Learning how to make repeating patterns in Photoshop makes me happy.

    The quilt top

    It's just... really, really exciting to have an idea in my head spool out so damn slowly and yet stay as I envisioned it. It's just a collage quilt, but it's a project I'm proud of. Few endeavors strain and stretch my creativity in so many different ways, it's a feeling I highly value.

    Friday, August 14, 2015

    Extracting comments from Google Docs

    One of the best parts about Google Docs is the whole easy-to-share aspect of it, which includes an excellent commenting system.

    Google will happily let you export your document, but this extra info is harder to get ahold of. From the drop-down menu you can currently export your file as: PDF or RTF (has formatting, lacks any comments), TXT (has comments, lacks formatting), or HTML (has comments and formatting). However, check out what the HTML output looks like:

    That's really close to what I want, but it lacks the highlighting to indicate exactly what the comment is referencing. Or does it?

    Here I've marked up all the <p> tags with a green border and all the <span> tags in blue. You can see that there are spans wrapping the formatted text, but also where the highlighted text would be. Most notably, see how "obnoxious" is split across two tags.

    Unfortunately, there's no markup in the <span>s themselves to indicate which comment it goes with. There's the tag/link right after it, which will have to be enough.

    <sup><a href="#cmnt1" name="cmnt_ref1">[a]</a></sup>

    But now, how to tell how many of those previous span tags, working back from the link, is part of the comment? For that, you gotta' lean on the Google Drive API. Specifically, the comment's list endpoint.

    Look at that! It even has the user who made the comment and the timestamp. All we could ever want. It also indicates there was a reply, which the [b] comment is. The important field it has though is context. It doesn't tell me *where* in the document that context is (that's okay, we've got the HTML) but it does tell us how much of the content the comment spans.

    And that's it. Well, the basics at least. From there, it's a bunch of corner cases about character escaping and sticking together the spans the right way so you can match the context string. Haven't ironed all those out yet, myself.

    For some specific examples (and some gnarly code) you can checkout some segments of my project on Github, specifically grabbing file information, content, and comments and pairing comment with highlighted text in a very brittle way.

    If there's a better way to do this, I was unable to find it and would love to hear about it! Seems odd that it was this convoluted... am likely missing something.

    Saturday, November 1, 2014

    Body casting & Halloween

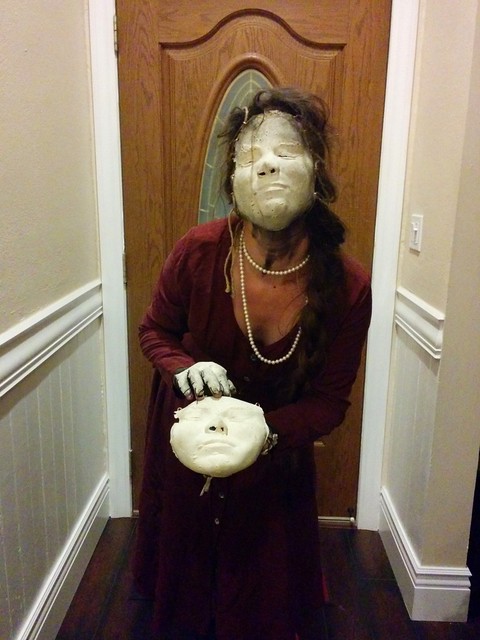
    Halloween 2014

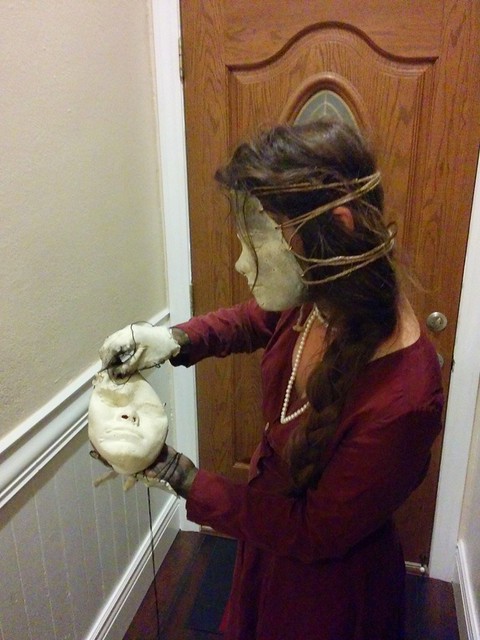
    Goodness gracious, casting with alginate is super fun and super easy (which I guess just adds to the fun-ness). I wanted to build a face prosthetic for Halloween this year but wound up pivoting midway through. In the end I won the "scary" contest at work and caused several children to gasp in fear upon my doorstep so I'd say this whole thing can be written down as a success.

    Highlights of it all?

    • A small frightened princess on my doorstep placed a hand to shield her eyes as she turned away from my visage.
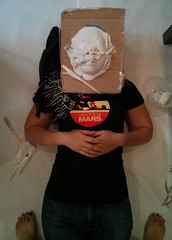
    • Suko standing above me and happily saying "It's like frosting a strange cake!" as she poured cold alginate over me. This caused my smirk to be captured, I believe, which Adam claims adds to the creepyness.
    • At least three little ones silently shaking their head and attempting to back up as I descended the front steps.

    Casting with alginate

    To stress how easy this was, let me run through the process really quick.

    Step 1. Acquire supplies, both of which are available on Amazon (Prime eligible). 1lb (454g) Alginate Molding Powder ($15) & Plaster Gauze (4"x15') ($7). The other ingredient is just plain old water. It helped that I had a food scale, but they include directions for mixing by volume as well.
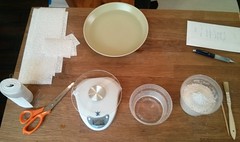
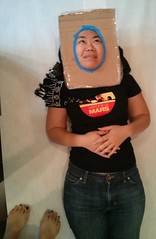
    Mise en place
    I learned the phrase mise en place!

    Step 2. Cut out a shield. Exacto knife + cardboard-- though technically this isn't required, it made things a lot easier. Use packing tape to create a lip/guard around the edge in case your alginate is runny.

    Step 3. Mix. The package tells you 3.75 (water) : 1 (alginate) by weight and that works. (also says 1:1 by volume) Error perhaps for a pinch more water, I liked runnier over thicker mix.

    Step 1: Be Ready Step 2: Alginate Step 3: Bandages

    Step 4. Pour! Don't wait till it's totally white (I did and that's why Suko's nose got screwed up). Mix till smooth and then pour even if still pink. Sets in about 3.5 minutes!

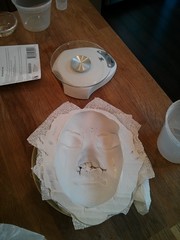
    Step 5. Support! Dip the cut bandages in the water briefly and then apply to face. Takes 5-8 minutes, only needs about 2 layers (can be applied at the same time). Be aware the bandages will NEVER dry all the way. The alginate is too moist. Just let them set 8 minutes and be done. The whole thing will always be a bit delicate, so be careful.

    My face Poor Suko's Nose

    YOU'RE DONE!

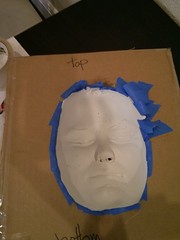
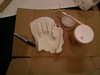
    Bonus Round. Buy some plaster of pairs and pour into the molds (as soon as they come off your face). Be mindful, the plaster HEATS UP as it sets. Never pour plaster directly onto your hands to cast. People have lost fingers doing this.

    Suko did a shallow cast of her face and I did a deep one (I wanted a lot of chin) and to fill them it took two full containers of PerfectCast ($10) which luckily is exactly what I had ordered.
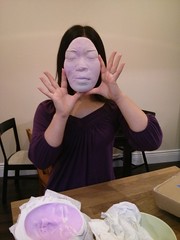
    Results

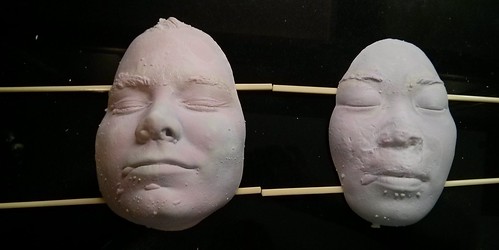
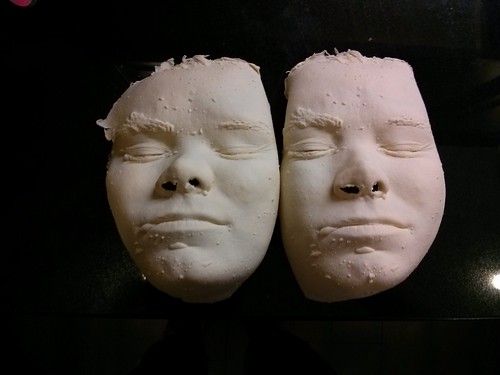
    Be aware that the alginate picked up lots of details but still had a couple air bubbles in it, which lead to bumpy casts. I think if we had worked in the thinner mixture, spreading it around with fingers or a brush rather than just pouring it on we could have worked out a number of the bubbles. Also, the thinner mixture had more but smaller bubbles.

    Messy Casts

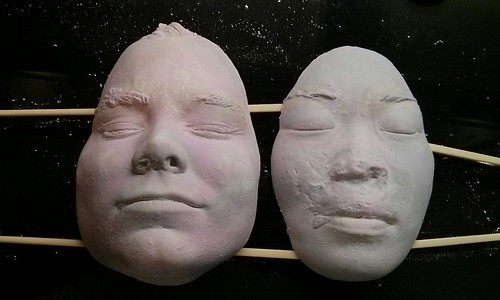
    Luckily an exacto knife proved perfect for cleaning up some of the bumps. The faces remained warm for quite some time, making it feel extra creepy under the finger tips as I worked my blade.

    Cleaned up faces

    On a whim I thought it'd be interesting to try and make a latex mask with the face negative. I'd picked up some liquid latex ($20) a while ago from my local Tap Plastic and hadn't really successfully used it yet. In between building up the jaw device (which was eventually abandoned) I applied a coat. After 8 coats and a day of work I figured "what the hell" and pealed it off (I only let it sit 12 hours as opposed to the suggested 24).

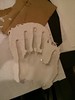
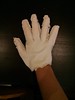
    The results really surprised me and I immediately re-thought my entire costume. And started laying down layers for a second mask. And then later cast both my left and right hand the following day (by myself!)

    Un-Supervised Crafts Another layer on My hand on my hand

    Notes about making a liquid latex mask

    • For a mold the container says you need 8 - 20 layers. I found my mask to be great and it was (I think) only 10 layers? The hands were less, 8? which was reasonable but the left was only 6? and that I think was getting too thin. Somehow I failed to keep a reliable count for each of my 4 masks.
    • It doesn't tell you how long it takes to dry, only that you need to let it dry fully between each layer. Online I saw a range listed as 15 min and 2 hrs. I found 15 min early on if it's thin enough, but later I was waiting up to 40 min or an hour. I'd test dryness by tapping the latex with my finger. If I left a finger print or I got some on my finger, then I needed to wait longer.
    • If you wash the brush off right away with warm water you can get most the latex off but little gummies will build up over time no matter what. I managed to need only 2 cheap brushes for all 4 masks (both brushes winding up in the trash by the end)
    • Dabbing the brush with a bit of water really helped. Thinning the latex with a little water (or just by using a damp brush) helped.
    • I have the pint sized container of liquid latex. All four masks put a dent in it but I'd say it took less than half of what I had. (I'm apparently really bad at estimating volume)
    My two masks
    • The alginate will start shrinking the moment it's cast. This meant that my second mask (started ~25+ hours after the initial casting) was noticeably (when worn) smaller! If you want a permanent mold, just invest in a latex one (but that sounds more complex and expensive)
    • Using a pair of good scissors I could easily snip the latex for threading & ring addition. For the hands I used an upholstery needle. You can't just push the needle through, I had to use a pad of sticky notes and press the needle tip into that to puncture the mask (otherwise it just stretched). The thinner glove seemed to be harder to puncture for some reason (it just stretched and then some times tore open next to where I was trying to stitch)

    So... yeah.... Good times. Multiple people informed me that I looked scary. At least three people tried on my second face mask. Learned a new craft. Won a prize. Have a face cast to build on for future projects. Am happy.

    Halloween 2014