Showing posts with label LaTeX. Show all posts

Monday, November 2, 2015

Getting 8 pages from a US Letter page

This is one of those things where I'm sure the answer is clearly posted somewhere on the Internet... and I just really couldn't find it. So I'm typing up my solution here in the hopes that the next person who looks for the answer can more easily find it.

The problem was simple- I have a single piece of "normal" US Letter paper. I wanted to get 8 pages (4 per side) out of it. I also wanted the page to be part of a signature, which meant the layout of the pages wasn't just 1-4 on one side and 5-8 on the other. What am I printing? I'm printing a PDF of N pages. It happened to be generated by LaTeX but that shouldn't matter for this really.

So, how? Easy- use two command line tools pdf180 and pdfjam. The pdf180 command is required to flip the pages upside down so that they're right-side up when you do the first fold (which will later be cut open). pdfjam is required to correctly tile 4 pages per side of the paper so they're in the right order when you do the second (spine) fold.

That means a simple, single page would look something like this:
# assuming what you want to print is named MY_STORY.pdf
pdf180 MY_STORY.pdf --outfile TEMP_FLIPPED.pdf

pdfjam --nup 2x2 TEMP_FLIPPED.pdf '1,8' MY_STORY.pdf '4,5' TEMP_FLIPPED.pdf '7,2' MY_STORY '6,3' --outfile LAID_OUT_STORY.pdf

You now have a nicely laid out LAID_OUT_STORY.pdf to print and a TEMP_FLIPPED.pdf file you can delete.

That's all cool... but what if you're trying to print, say, a 445 page document? And you want to use 4 pieces of paper per signature for a total of 32 pages, front and back? That requires... PROGRAMMING! So I wrote a script which you can find over at my GitHub repo: signature_creator_32.sh. There's also the 2 pieces of paper/16 pages total, front and back variant: signature_creator_16.sh. If I were a not-lazy programmer I'd have written a single script that could dynamically take how many pages per signature. Oh well.

Disclaimer: the scripts don't handle missing pages at the end of your document. It does notify you if it's expecting blank pages, but what that really means is that it'll crash on the last pdfjam call. Just copy the command printed to the terminal and add in {}s instead of pages numbers that exceed your page limit. Again, if I were a not-lazy programmer I'd have written that in too, but bash scripting was... icky.

What this gets you is a new folder called output (careful! all content in existing output folder will get deleted!) filled with files temp_sig_1.pdf, temp_sig_16.pdf, temp_sig_32.pdf... etc, the number being the first page for that signature set.

So now you have as many files as you have signatures. That's obnoxious if you want to take a thumb drive to Office Max or something and have you print 3 copies of the book. So there's a second script called glue.sh that you can run and it'll reach into the output directory and squish all the temp signature files into one file called book.pdf. And that is what you print.

Warning: if you go to the last page of the book.pdf, don't freak out that it doesn't have the last page of your original document! Remember, the signature is folded so the last printed pages will actually be some 6-12 away from the actual "end" of your book. I forgot this fact once and spent nearly 5 minutes having a heart attack thinking I had printed four copies of the wrong file.

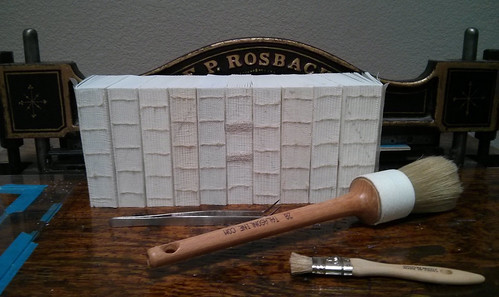
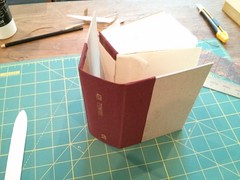
Great! Now you have a stack of paper with your content printed on it! In the case of my 445 book that means 56 pages that need to be folded into 14 signatures.... and heaven forbid you get those pages out of order. Even with them being in order it takes a little bit of a mental warm up to ensure you fold them correctly. And so, here's an animated image and some basic steps to take in order to fold correctly:

  1. Ensure the lowest page number for the signature is in the upper left corner (upside down)
  2. Take page off of stack and place it "face" down, landscape. Lowest page number now lower right, face down in front of you.
  3. Hamburger fold the page, left side atop right. You can verify correctness by ensuring page numbers are consecutive inside the fold. Lowest page number still face down. Press edge with bone folder.
  4. Set aside. Repeat steps 1-3. You can be certain things are aligned correctly when the page number offsets of lower top page are 4 apart. They increase 4, 8, 12, 16, 20, 24, etc. Looking at the ones digit it's easy to follow the cycle -> 4,8,2,6,0,4
  5. On your 4th page stop. You'll know you're done with this signature set because after the hamburger fold in step 3 the to page should have consecutive pages. This is the middle of the signature.
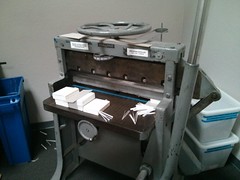
  6. Use a knife to slice half the fold on each piece of paper- be consistent on which half you cut. Don't cut the rest of the fold until you're done with stitching the spine. If you're going to use a guillotine, just let it deal with the fold. Brace against something flat, fold, and press! VoilĂ ! Now you have a signature!


Final note: since I used LaTex, here is what my page geometry looked like for the original PDF generated:
\geometry{
     a5paper,
     % due to the folded nature of my printouts, and the
     % failure to scale the paper correctly the bottom
     % and non-bound margins have extra space. The top
     % and the bound margin are expected to be the
     % specified offsets here.
     bottom=4mm,
     left=2mm,
     right=2mm,
     top=20mm,
     bindingoffset=15mm,
}

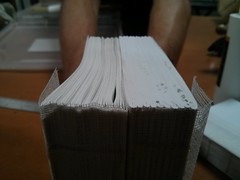
That's what I printed. And things looked great! And then I stitched my 14 signatures together and some skew crept in. And then I used the guillotine and came within a hair's width of losing content on the top and bottom. I didn't! But it was waaaay to close for comfort. Will definitely be adding 5mm to the top and bottom margins next time around.

Final final note: I used \documentclass[10pt]{book}, \setlength{\parindent}{5mm}, and \setlength{\parskip}{4mm}. It's tiny, but legible. Definitely don't go smaller! A little larger would probably be nice but I couldn't afford to bump the book length any longer than it already was.

Sunday, November 1, 2015

Completed: Book binding

My five editions of the first two volumes of 4th Terminus are done. An epic (for me) feat started just after I quit work (July 15th) and completed almost three months later (October 7th).

All of them done & paired

Many many thanks to both friend Suko for her copy editing time & efforts and friend Scott for the inspiration & assistance on the binding project overall. Scott has been into book binding for many years and was good on his promise of helping me out when I finally found something I wanted to print & bind. Of course, I think original promise was to assist with "a book" rather than a printing run of ten at once. Luckily Scott is the right kind of nerd in all things and seemed to enjoy as much as I the challenges & differences unique to mass production.

No irrecoverable mistakes were made! Really, the only goof was that I should have affixed my end papers BEFORE I pasted on the crash. Instead, I wound up hand trimming them and adding them in just before the covers went on. Smoother gluing of end papers to cover and better shoulder position/size would have helped things, but I assume I'll just get better at that with practice.

Cut once, measure DEAR GOD ONE MORE TIME! Dramatic differences + smudge
All lined up

The guillotine cutter was magical and made my lame hand-bound signatures transform into some professional looking content. It also left behind little black smudges on my beautiful white paper. Luckily Scott and I had already been discussing the idea of speckling the page edges- the smudges just made it a requirement. Purple & black were selected for reasons and did an excellent job of hiding the blemishes.

Looks like official paperbacks Obfuscating those smudges

Scott bravely operated the foil heat machine, facing down a number of hiccups/problems. Turns out the foil and the book cloth don't mesh well. Maybe next time leather is needed? Regardless, all of the printings look great and really gave the books an old library book vibe. Which is good.

Foil machine The best pair

Turns out mass-producing books takes TIME (especially when we're semi-figuring things out as we go) so after the cloth was printed & covers were cut, Scott and I parted ways as our time was up at the the Center for the Book. Great place, that. Will be going back again for classes. Knowing what I know now, will be much faster/better prepared when renting equipment/space/time in the future. Anyway, it meant the cover construction and assembly happened at home, unsupervised. I think it went pretty well.

Getting close Covered cover The queue...

I wound up gluing most the covers on at the session in which I handed the books out. Time management. It's hard.

Knowing what I know now, I'd say the steps for the next run of books I do will be as follows:

One of my main regrets was that I didn't take better photos throughout the process. My phone camera is pretty weak-sauce. Luckily friend Suko took some excellent photos of her books! (and if you follow either of us on other social medias, you're probably sick of seeing them over and over by now) Re-posting them here, with her permission, for prosperity:

Suko's copy An interior shot Suko got the best endpapers

Friday, August 14, 2015

Extracting comments from Google Docs

One of the best parts about Google Docs is the whole easy-to-share aspect of it, which includes an excellent commenting system.

Google will happily let you export your document, but this extra info is harder to get ahold of. From the drop-down menu you can currently export your file as: PDF or RTF (has formatting, lacks any comments), TXT (has comments, lacks formatting), or HTML (has comments and formatting). However, check out what the HTML output looks like:

That's really close to what I want, but it lacks the highlighting to indicate exactly what the comment is referencing. Or does it?

Here I've marked up all the <p> tags with a green border and all the <span> tags in blue. You can see that there are spans wrapping the formatted text, but also where the highlighted text would be. Most notably, see how "obnoxious" is split across two tags.

Unfortunately, there's no markup in the <span>s themselves to indicate which comment it goes with. There's the tag/link right after it, which will have to be enough.

<sup><a href="#cmnt1" name="cmnt_ref1">[a]</a></sup>

But now, how to tell how many of those previous span tags, working back from the link, is part of the comment? For that, you gotta' lean on the Google Drive API. Specifically, the comment's list endpoint.

Look at that! It even has the user who made the comment and the timestamp. All we could ever want. It also indicates there was a reply, which the [b] comment is. The important field it has though is context. It doesn't tell me *where* in the document that context is (that's okay, we've got the HTML) but it does tell us how much of the content the comment spans.

And that's it. Well, the basics at least. From there, it's a bunch of corner cases about character escaping and sticking together the spans the right way so you can match the context string. Haven't ironed all those out yet, myself.

For some specific examples (and some gnarly code) you can checkout some segments of my project on Github, specifically grabbing file information, content, and comments and pairing comment with highlighted text in a very brittle way.

If there's a better way to do this, I was unable to find it and would love to hear about it! Seems odd that it was this convoluted... am likely missing something.