Showing posts with label solder. Show all posts

Monday, October 21, 2013

Keyboard Hoodie Project part 1

So, I'm kinda' excited. I have a new project in the works and I'm already making good progress. Next month is NaNoWriMo, which every year I aspire to participate in and every year but one I've fallen flat on my face. What happened that one year? Well, I had a lovely commute every day on the light rail which was an enforced 30 min of writing (by hand). I find my thinking is clearest when I'm not just sitting on my computer at home-- when I'm not sitting at all in fact. That's why I've been inspired to do a keyboard hoodie. I've tried voice dictation stuff, and typing on a phone, but in the end my fingers on keys are like magic. Speed of thought, yo!

The basic idea is there's a hoodie I can shrug on (zipper down the middle), plug my phone into a sort of pocket on the right forearm, tuck my hands into the hoodie pockets, and BAM! I'm typing.

Years ago I picked up a cheap USB keyboard with the cute idea of removing the key covers and replacing them with some embroidered buttons... HORRIBLE idea in retrospect- high-use keyboards get super dirty around me. I can just imagine now how gross the smudged and worn embroidered D and J buttons would look. Ugh. BUT! The important thing is that I kept the keyboard. This Sunday I settled down with it and popped out each and every key. I tore it apart until I had access to the traces sheet, which I scanned and backwards engineered. Photoshop Flood Bucket FTW. (I had to set the tolerance to 20px to prevent leaking between the traces)

I'm only trying to grab the bare minumum of keys so numbers and functions and whatnot are out. Shift, enter, delete, space, and some punctuation [,.?"] are what I'm aiming for. Mapping it out on a sheet of paper I then plugged the bare board into the computer (about half the size of a cell phone at the end of a long usb cable) and then proceeded to short pairs of pins to ground. Thanks to this keyboard tester site, I found that my sample set of mappings proved to be correct! Go me! It's exhilarating to short some exposed pins with bits of wire and see "z" and "n" show up on screen as expected.

My initial joy was temporarily dampened by the prospect of breaking out the lines for the 27 pin connector.... Turns out that really thin connector style isn't called a "ribbon cable" but instead a "flat flex" connector, and hacking on the cable itself was a no go- too delecit and tiny. However! I found that soldering little lines to where the connector met the board turned out to be super easy. Yay for not having to lay down new solder myself.

I spent a lot of today thinking about how to make the buttons... Wikipedia helped me name my problem-- I wanted a switch that would let me ground 2 lines at the same time and it turns out what I wanted was a DPST (double pole, single throw) switch. But not just any switch, a really tiny push button switch... for which initial Googling did not yield any results. So I eventually abandoned the idea of buying something and turned my thoughts to constructing one myself.

I'm very excited with my initial solution. I'm going to be making ~40 buttons so something simple and cheap is nice, which this is. The idea comes from the original keyboard which has 2 sheets of plastic separated by a 3rd sheet. The button you press forces them to contact each other and a grounded metal plate in the back. My version is a segment of foam with a hole-punched circle taken out of the middle. I then run 3 lines of conductive thread through the foam at different levels such that they all cross. When I press with my finger, the lines touch and everything lights up.

Interestingly if I place a popped key atop it and press, the lines do no cross-- much like a real keyboard button the slightly convex shape of my finger is required to actually force contact (the keyboard has a nubben) . A flat surface bearing down on them is not enough (assuming the correct amount of tension remains on the conductive thread)

My next step is to acquire a hoodie and begin placing pieces. I've got new finer soldering irons tips in the mail, as well as a USB OTG adapter which will let the "keyboard" talk to the phone- a horribly vital piece that I pray just... works. I've also got to construct a set of buttons and ensure I can actually wire them up next to each other at close enough proximity... Praise be to my random purchasing habits! Having a hardly used spool of conductive thread on hand is super helpful!

Here's hoping I can get it done before Nov 1st...

Monday, March 25, 2013

The Basement

Craft Room : Beginning
In October we moved to a lovely little house that we're renting in the Mission. There is a dark, dank, low ceilinged basement which Adam has generously "given" over to me to do with as I wish. Of the two rooms, I originally claimed the larger one till flooding and ants chased me out of it. Now I'm in the smaller section, near the door, with the window. Not bad. The whole "unpacking" thing still hasn't finished and I've not enough carpet to cover the floor... but despite that, I have begun to "move in" and make the space feel more like my own.

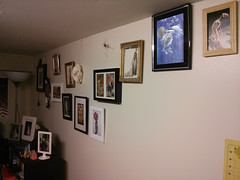
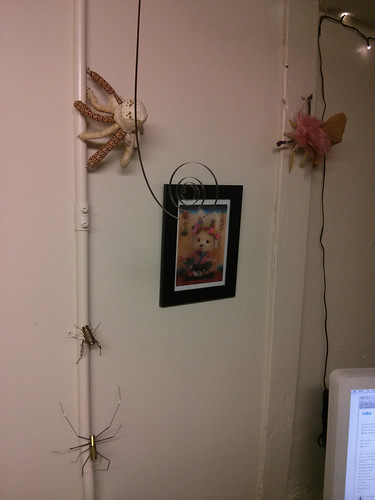
I'm quite fond of my growing wall 'o things. Pictures, a skull, some bullet bugs, fabric creatures, things. Since the basement wall is unfinished I feel no qualms about sticking a hundred and one nails into it. Craft Room : beginning The only thing holding me up is my lack of frames (apparently only Ikea has non-tacky yet still cheap frames! Curses! I had hoped not to need to return so soon!) and the knowledge that I want to have some sort of ... useful tool hanging "things" above the desk. I've ideas & supplies, just not the time to pull it together.

Having my sewing machine out is pleasing, along with all my books and thread available. My fabric and yarn collections are still abandoned in the other room, which needs to be corrected. I've been making good use of the desk though, cluttering it up with pins and soldering supplies. My old iMac is practically useless (I can upgrade no further) but it does at least play music and let me search for reference photos. You can't really tell from the top photo, but beyond the ironing board (which I was using to iron plastic, thread, beads, and wire together to make wings!) is my lovely futon bed for those who are bave enough to stay over.

Craft Room : tiny monsters
If we owned the place I'd put forward efforts to actually improve the basement (like finishing the fucking walls!) but we don't and so I can only hope to cover and work around its "quirks". One thing that isn't horrible is the metal pipe? that runs over the wall and on the ceiling for the SINGLE outlet in the room. Sticking monsters to it via magnets makes me happy.

So, yeah. Some horrible photos of my "crafting cave".

Dr Sketchy's Alotta Boutte
Other things: I've been playing the Starcraft Campaign! I <3 Abathur! Expect to see related crafts soon. I had my butt handed to me at Dr. Sketchy's last week, could not get in the grove. I appear to be momentarily tapped out on the letter writing front. Need to recharge. Have been crafting a magnetic wall butterfly monster... thing... educational, but it's not quite coming together as I had hoped. I bought the thumb drive of stock poses from Senshi Stock but haven't found the chance to sketch anything from it yet. Am excited to do so at some point. Went to Angel Island for the first time and loved it. Saw the movie Stoker. It was... kind of fun? Watched Strage Days again, it was also rather fun. Both have horrible dark parts to them though so I can't broadly recommend. Also saw Pitch Perfect which was delightfully silly & fun. Have been quite enchanted with one of the songs from it. I was compelled to sketch the scene it's from and you can listen to it below.
Pitch Perfect : Cups Song

Sunday, January 20, 2013

Hectic Week

Last night and the night before was dominated by the Edwardian Ball. Good times were had, sketches made, and trinkets purchased. I currently have a minor headache though due to the lack of sleep so I don't feel like shuffling together all the scans and photos to go with it. Next post, next post...

Short version: it was fun- though not as fun as previous years. Lost my black pen relatively early Saturday night and there is NO way you can draw folks at the ball without copious amounts of black. Also- Friday has lots of stuff going on to walk about and see, but Saturday is all show for which I will always buy VIP tickets for. Why?

Edwardian Ball Balcony
My, what a lovely performance that only the balcony folks and a handful of the lower class can see!

My sleep depravation starts before this weekend though. Finally felt the crafting itch and spur of the moment like made this fellow.

Warm up project
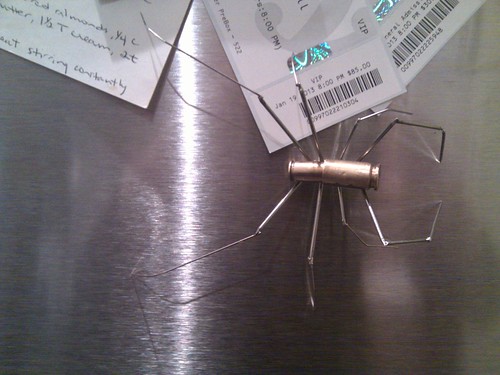
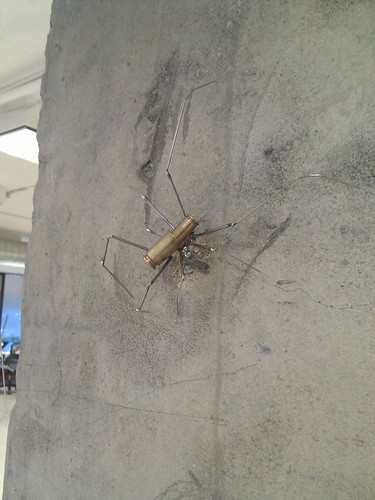
That wasn't really what I had planned for the evening, but I'm happy with the results. More scorpion like then spider like, alas. Dug out a new soldering iron tip and practiced not sucking... looks like I need more practice (I've no complaint how the bug looks, but my joints are sloppy and my technique horrid) Did a better job this time with getting the legs to line up and whatnot. Magnets! Magnets solve everything! I used one to hold the fellow in place while I worked, which also happend to be the final offset hight from the surface I wanted so I knew the legs were all sitting correctly. It also helped that I soundly sanded and then wiped down where I was soldering to on the bullet casing.

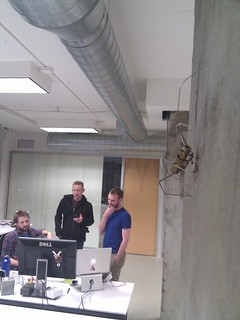
Was happy to bring him into work. Nothing says "Rebecca sits here!" like little monsters and bullet bugs. Calming. Pleasing.

Where does Rebecca sit?
The fellow has already lost half a leg though- testament to my shitty soldering job. I think I'll bring the iron into work and just fix him there though. Walking down the street holding him is and odd feeling.
My new job
Work itself has been going well enough. Not sure what to say. Oh! I guess I could say that I've been making bugs at home and fixing them at work all week long. Ha! A joke! Bugs & bugs! Hahahaha.a...aha.... I'm going to take a nap now. My head hurts.