Wednesday, January 27, 2016

Gaming Craft

I like gaming. The social aspect is fun, yes, and story telling, but it's this whole crafting/art project portion that really hooks me.

As I've aged I'm finding it a little harder to just make things willy nilly without thought as to why or for what purpose. I've tucked about as many little monsters about the house as Adam will let me. I've given ones to many friends and all family members. Why make more things? Well, making things is FUN! But... why? That's where gaming comes in. Now I'm making not just "something" but rather a prop or an accessory. A visual aid for something that involves more people than just me. Purpose.

D & D : Prep is fun

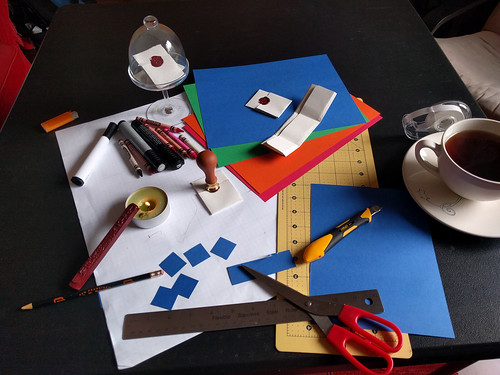
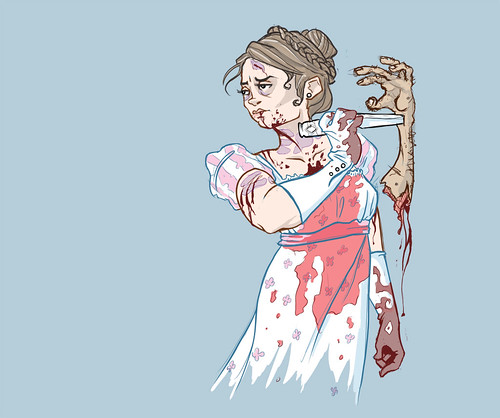
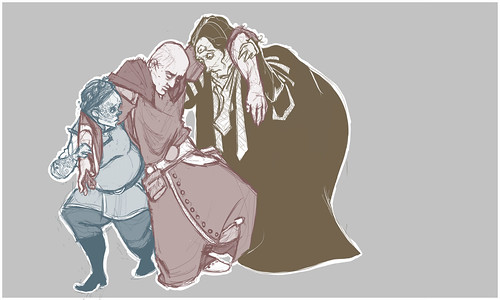
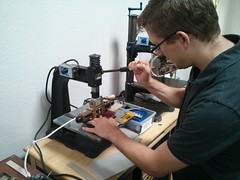
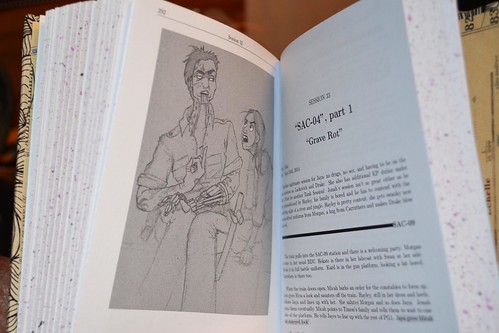
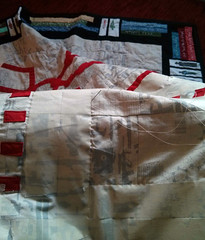
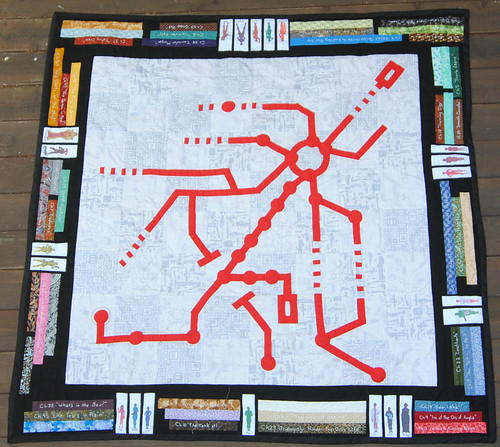
Up until this point I've mostly been playing in games but 2016 is the year I dip my toe in trying to run them. Picked up the D&D 5e suite of books/rules and have run 2 little one-shot games for my friends. Wouldn't say they've been that successful but I've definitely enjoyed having friends over and having an excuse to think creatively. The first game involved a 2 level map where I drew the ground on graph paper and then had a tree branch level drawn with dry erase markers on a glass shelf (resting on several cardboard tube tree trunks). The second involved a dungeon map slowly revealed as people explored it.

D & D : ready for that dungeon crawl

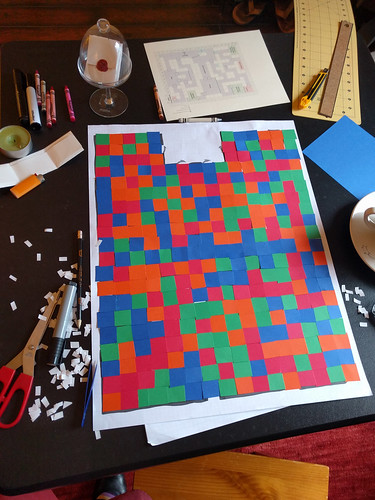
Turns out peeling off square by painful square of "fog of war" isn't super fun. Also, candy colored "fog of war" really doesn't add to the "dungeon crawl" vibe... The problem wasn't the taping down (that actually worked super well) but just the general scrabbling for a hold on tiny paper piece in order to pick up. One takeaway from it though was that drawing the map was a good exercise in thinking about the story and helping me build out an idea. Drawing is my best way of building a narrative- something I've known for a while.

Rogue Trader : Homework

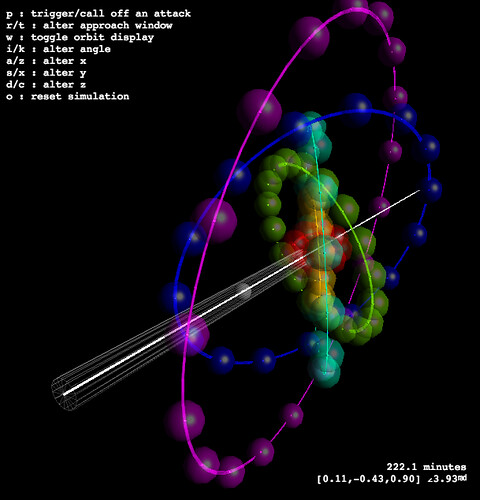
Another delightful gaming craft recently worked on was the Rogue Trader Yu'Vath Battlestation Assault Plan. Given a rather math-y description of a patrolling ships around a point of interest, friend Nate and I wrote a little simulator to help find the best approach. Mind you, this is for a game I'm not even in. Was thrilled to have a valid reason to use the three.js library again and limber up my mind, wrapping it around 3D math/space/modeling. Not sure how long Nate will host it for, but the simulation is up at this site right now. [code posted on Github]

Monsterhearts : The PCs
While not really a craft, I've found games (mine but especially others') to be an excellent source of sketching and art. Friend Kelly drew the characters from a game and then flattered me by asking to help with inking/coloring it. I appreciate that with her effort/interest/involvement I managed to overcome the wall of white space most my sketches hang in and provide the vaguest of something for background (drawing backgrounds being my majorly failed 2015 New Years resolution). Never mind the fact that it's mostly a munged photo I found on the Internet...

I was going to follow this up with several more gaming sketches but alas this week's plot didn't get far enough...

Named arrows fly better

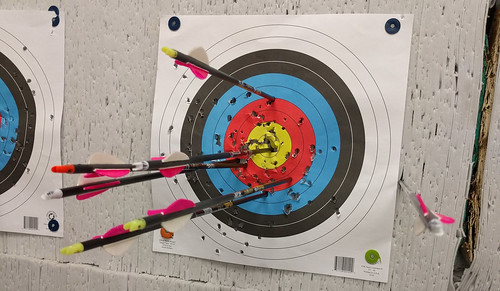
Along the gaming craft tangent: applying game content to other activities. Friend Suko and I continue our once-a-month shooting. I've marked my arrows with names of 4th Terminus characters and not only does it help me improve my aim/track my shot history but it also tells a story with every round. "Oh Hayley, once again going off target. Morgan, always flies true. Jayce, right where I send him and look at that- the Jaya arrow is snug up against him. Again." What I need to do now is figure out a better way to label the arrows. Right now I've scribbled the names on the nocks (over half of which need to be re-aligned) but the ink rubs off so easily there.... Anyway, the important take away is that once I named my arrows and could track which offset/corrections were needed for each I was able to hit the bullseye three times with the arrow named Jaya. Just saying. The other arrows need to start pulling their weight.

In conclusion gaming is fun. Friends are great, telling stories with them is a fantastic way to pass the time, and using said content to overlay on other actives makes everything better.


Sunday, January 3, 2016

Drawing 2016

Started the new year off right with an intense bout of sketching. On Friday I spent ~8 hours in front of the Cintiq and Saturday I followed up with a couple more.

Pride & Prejudice & Zombies

Drawing that much in one continuos flow felt great. The pictures themselves I don't know, but the feeling was fantastic. If I could draw like that more often I'm pretty sure I'd actually get better. Last night I had a vivid dream that I was still sketching, woke up partially and continued to feel it. "Gotta' make sure I save..." I remember thinking. This amuses me because it's the same sort of sleep processing feeling I get when I'm coming up to speed on a new programming language.

The main resolution last year that I completely bombed was "learn to draw landscapes" and it's definitely one I still want to try to tackle this year. And by landscapes I mostly just mean backgrounds, even the faintest of hints, for my sketches....

Corvo- so weak!

Using Clip Studio Paint as my primary sketching app & then doing colors/fill in Photoshop is working out quite well. I'm in love with the smoothing CSP does to the lines and I love the sensitivity options on the Pen & Pencil tools. I'm often jumping to the Marquee tool to reposition/resize my sketching as I go and often toggle back to the Pen tool by accident for a couple of strokes when I actually wanted the Pencil tool (both toggle on the P key). This has given an interesting sort of pacing/cadence to the the line sketching. Light feathery lines (Pencil), correction (Marquee), a few bold strokes (Pen), repeat.

Still feeling quite restrained in what I'm drawing though. Only used a pinch of photo references for the non-human elements but all subjects/scenes were from gaming sessions. Descriptions I heard or read. None of the crazy emo feeling sketches that spill out from my pen when I reach down inside and try to personify what the fuck is going on in there. Maybe next time.

...

Sunday, November 29, 2015

A Quite Thanksgiving

Indecision Pie

Thanksgiving this year was a medium sized gathering in the South Bay with friends. No family, mine being scattered about this year and all the girls lacking the freedom/time to travel. Alas. Looks like Christmas will also be Steckerless for the most part.

My contribution to this year's meal was potatoes and pie. My much anticipated (by me) purple potatoes and coconut cream (aka vegan mashed potatoes) was an absolute dud this year. I blame the potatoes. The pie however went well. Earlier this year I had a pie crust near-fiasco... which is ridiculous now that I look back at it because I have/had a food processor. Used it for the first time to make pie crust and am never going back.

Indecision Pie Progress

Adam made Pumpkin Pie to ensure a reasonable dessert was available. I couldn't top the Venn Diagram Pie of years previous but thought hard to come up with something fun. Wound up with Indecision Pie. I used scrap aluminum (from a project waaaay back when) to create structural supports for some concentric circles. Blind baked the crust with only the inner circle for the first 12 min since that has the foil & pie weights portion. Removed foil & weights and added super-thin outer circle and cooked another 15 min. When it came out of the over I removed the inner support right away (no problem) but the outer support I left in place until I filled the apple section because it was likely to topple if left alone. Middle portion was left-over pumpkin pie and some raspberry filling ended up in the center.

In hind-sight go apple, raspberry, pumpkin next time. Apple & pumpkin: that's a no.

Thanksgiving Tarot

After dinner there was some tarot reading for some folks and one of the dogs. Amusing and silly. Sadly no one in attendance actually knows much about the cards so every step of the way required flipping back and forth through a book. There was also an I Ching reading/toss(?). There was also a walk. A fine tradition, that. I love the post-Thanksgiving meal walk, wherever it may be or go.

Traditional Pumpkin & Tea

Many things to be thankful for this year. A year of changes for myself and many around me, most (all?) of them for the better. Lots and lots of new jobs, I gained a brother-in-law, there was another Dr. Stecker in the family (for about 2 weeks before she went and got married and took his name- ARRRrrrggg!) and if things All Go Well there will soon be another one (who will keep her title/name pairing). I am thankful that these job changes have been for the better. That I've been gaining family and not losing it. Relationships starting and deepening rather than fraying or ending. I retain my health and others appear to be doing well (except perhaps for the dear Grandmothers). In fact my health along several different axes is in a much better state now than it was this time a year ago. The world at large seems to be becoming more hostile and dark (though perhaps that's just my age tinting my world view) but I am thankful that my life appears to be trending the opposite direction. I'm meeting more people who I find enjoyable. I'm continuing to add to the "things I can do" pallet of possibilities.

Life is good.

Monday, November 2, 2015

Getting 8 pages from a US Letter page

This is one of those things where I'm sure the answer is clearly posted somewhere on the Internet... and I just really couldn't find it. So I'm typing up my solution here in the hopes that the next person who looks for the answer can more easily find it.

The problem was simple- I have a single piece of "normal" US Letter paper. I wanted to get 8 pages (4 per side) out of it. I also wanted the page to be part of a signature, which meant the layout of the pages wasn't just 1-4 on one side and 5-8 on the other. What am I printing? I'm printing a PDF of N pages. It happened to be generated by LaTeX but that shouldn't matter for this really.

So, how? Easy- use two command line tools pdf180 and pdfjam. The pdf180 command is required to flip the pages upside down so that they're right-side up when you do the first fold (which will later be cut open). pdfjam is required to correctly tile 4 pages per side of the paper so they're in the right order when you do the second (spine) fold.

That means a simple, single page would look something like this:
# assuming what you want to print is named MY_STORY.pdf
pdf180 MY_STORY.pdf --outfile TEMP_FLIPPED.pdf

pdfjam --nup 2x2 TEMP_FLIPPED.pdf '1,8' MY_STORY.pdf '4,5' TEMP_FLIPPED.pdf '7,2' MY_STORY '6,3' --outfile LAID_OUT_STORY.pdf

You now have a nicely laid out LAID_OUT_STORY.pdf to print and a TEMP_FLIPPED.pdf file you can delete.

That's all cool... but what if you're trying to print, say, a 445 page document? And you want to use 4 pieces of paper per signature for a total of 32 pages, front and back? That requires... PROGRAMMING! So I wrote a script which you can find over at my GitHub repo: signature_creator_32.sh. There's also the 2 pieces of paper/16 pages total, front and back variant: signature_creator_16.sh. If I were a not-lazy programmer I'd have written a single script that could dynamically take how many pages per signature. Oh well.

Disclaimer: the scripts don't handle missing pages at the end of your document. It does notify you if it's expecting blank pages, but what that really means is that it'll crash on the last pdfjam call. Just copy the command printed to the terminal and add in {}s instead of pages numbers that exceed your page limit. Again, if I were a not-lazy programmer I'd have written that in too, but bash scripting was... icky.

What this gets you is a new folder called output (careful! all content in existing output folder will get deleted!) filled with files temp_sig_1.pdf, temp_sig_16.pdf, temp_sig_32.pdf... etc, the number being the first page for that signature set.

So now you have as many files as you have signatures. That's obnoxious if you want to take a thumb drive to Office Max or something and have you print 3 copies of the book. So there's a second script called glue.sh that you can run and it'll reach into the output directory and squish all the temp signature files into one file called book.pdf. And that is what you print.

Warning: if you go to the last page of the book.pdf, don't freak out that it doesn't have the last page of your original document! Remember, the signature is folded so the last printed pages will actually be some 6-12 away from the actual "end" of your book. I forgot this fact once and spent nearly 5 minutes having a heart attack thinking I had printed four copies of the wrong file.

Great! Now you have a stack of paper with your content printed on it! In the case of my 445 book that means 56 pages that need to be folded into 14 signatures.... and heaven forbid you get those pages out of order. Even with them being in order it takes a little bit of a mental warm up to ensure you fold them correctly. And so, here's an animated image and some basic steps to take in order to fold correctly:

  1. Ensure the lowest page number for the signature is in the upper left corner (upside down)
  2. Take page off of stack and place it "face" down, landscape. Lowest page number now lower right, face down in front of you.
  3. Hamburger fold the page, left side atop right. You can verify correctness by ensuring page numbers are consecutive inside the fold. Lowest page number still face down. Press edge with bone folder.
  4. Set aside. Repeat steps 1-3. You can be certain things are aligned correctly when the page number offsets of lower top page are 4 apart. They increase 4, 8, 12, 16, 20, 24, etc. Looking at the ones digit it's easy to follow the cycle -> 4,8,2,6,0,4
  5. On your 4th page stop. You'll know you're done with this signature set because after the hamburger fold in step 3 the to page should have consecutive pages. This is the middle of the signature.
  6. Use a knife to slice half the fold on each piece of paper- be consistent on which half you cut. Don't cut the rest of the fold until you're done with stitching the spine. If you're going to use a guillotine, just let it deal with the fold. Brace against something flat, fold, and press! VoilĂ ! Now you have a signature!


Final note: since I used LaTex, here is what my page geometry looked like for the original PDF generated:
\geometry{
     a5paper,
     % due to the folded nature of my printouts, and the
     % failure to scale the paper correctly the bottom
     % and non-bound margins have extra space. The top
     % and the bound margin are expected to be the
     % specified offsets here.
     bottom=4mm,
     left=2mm,
     right=2mm,
     top=20mm,
     bindingoffset=15mm,
}

That's what I printed. And things looked great! And then I stitched my 14 signatures together and some skew crept in. And then I used the guillotine and came within a hair's width of losing content on the top and bottom. I didn't! But it was waaaay to close for comfort. Will definitely be adding 5mm to the top and bottom margins next time around.

Final final note: I used \documentclass[10pt]{book}, \setlength{\parindent}{5mm}, and \setlength{\parskip}{4mm}. It's tiny, but legible. Definitely don't go smaller! A little larger would probably be nice but I couldn't afford to bump the book length any longer than it already was.

Sunday, November 1, 2015

Completed: Book binding

My five editions of the first two volumes of 4th Terminus are done. An epic (for me) feat started just after I quit work (July 15th) and completed almost three months later (October 7th).

All of them done & paired

Many many thanks to both friend Suko for her copy editing time & efforts and friend Scott for the inspiration & assistance on the binding project overall. Scott has been into book binding for many years and was good on his promise of helping me out when I finally found something I wanted to print & bind. Of course, I think original promise was to assist with "a book" rather than a printing run of ten at once. Luckily Scott is the right kind of nerd in all things and seemed to enjoy as much as I the challenges & differences unique to mass production.

No irrecoverable mistakes were made! Really, the only goof was that I should have affixed my end papers BEFORE I pasted on the crash. Instead, I wound up hand trimming them and adding them in just before the covers went on. Smoother gluing of end papers to cover and better shoulder position/size would have helped things, but I assume I'll just get better at that with practice.

Cut once, measure DEAR GOD ONE MORE TIME! Dramatic differences + smudge
All lined up

The guillotine cutter was magical and made my lame hand-bound signatures transform into some professional looking content. It also left behind little black smudges on my beautiful white paper. Luckily Scott and I had already been discussing the idea of speckling the page edges- the smudges just made it a requirement. Purple & black were selected for reasons and did an excellent job of hiding the blemishes.

Looks like official paperbacks Obfuscating those smudges

Scott bravely operated the foil heat machine, facing down a number of hiccups/problems. Turns out the foil and the book cloth don't mesh well. Maybe next time leather is needed? Regardless, all of the printings look great and really gave the books an old library book vibe. Which is good.

Foil machine The best pair

Turns out mass-producing books takes TIME (especially when we're semi-figuring things out as we go) so after the cloth was printed & covers were cut, Scott and I parted ways as our time was up at the the Center for the Book. Great place, that. Will be going back again for classes. Knowing what I know now, will be much faster/better prepared when renting equipment/space/time in the future. Anyway, it meant the cover construction and assembly happened at home, unsupervised. I think it went pretty well.

Getting close Covered cover The queue...

I wound up gluing most the covers on at the session in which I handed the books out. Time management. It's hard.

Knowing what I know now, I'd say the steps for the next run of books I do will be as follows:

One of my main regrets was that I didn't take better photos throughout the process. My phone camera is pretty weak-sauce. Luckily friend Suko took some excellent photos of her books! (and if you follow either of us on other social medias, you're probably sick of seeing them over and over by now) Re-posting them here, with her permission, for prosperity:

Suko's copy An interior shot Suko got the best endpapers

Sunday, October 18, 2015

Completed: 4th Terminus quilt

The quilt is done and has been out of the house for over a week. Success.

This is the first quilt I have "finished" the quilting for and put through the wash. Yikes, what a heart attack! I was not prepared for the state it came out of the wash in and almost burst into tears. Turns out A) quilt batting holds a fuck ton of water and B) light colored fabric is SUPER transparent when wet. Thankfully one of SF's little mini October heat waves helped shed the water and the fabric returned to it's opaque state upon drying. Those first couple moments though... All the track stitching was done in red and while I clipped the threads, I didn't trim them back as short as I should have. Which meant that veins of red creeped out from the tracks when it was wet and all the character portraits had spider webs of black thread behind them.

Quilting

I'm shocked to say the quilting process was rather fun. And this is the first time I've abandoned the use of a frame and just quilted in my lap. Would not do so for the primary stitching lines that holds everything in place (yay for having a quilt frame for that!!) but for the "filler" stitching, it worked well. While I continue to swear that "the next time" I'm shipping the damn thing off to be machine quilted by professionals, I do find it to be quite appealing to add custom stitches specific to the quilt design. Used masking tape to help guide the lines, and that proved to be very useful. Have also used masking tape to guide applique sewing (because I suck at pinning), so that stuff is turning out to be a vital to have on hand.

The bare minimum Quilting

The back of the quilt was more complicated than it needed to be/should have been. For some reason I thought "Wow, this is waaaay too nerdy looking! It needs a stealth mode where you can flip it over and it doesn't look so... silly." So I did some minor slap-dash squares in a variety of fabrics. The rushed sewing job (and non-cotton fabric types) meant that it didn't lay perfectly flat, which became most noticeable when the quilting chased down all those wrinkles and pinned them in place. Oh well. This will be yet another flaw lost in the sea of detailed-stuff-going-on. On the up side, the station stitching clearly shows through the back of the quilt which I find to be quite fetching. Makes the effort of hand stitching such details more worth it.

Quilt Back

And now, don't make fun of me, I'll confess I've started a sample square as a proof-of-concept for next quilt*... Poor Adam was a bit sad to see the 4T one leave- it's one of the few I've made that was large enough to cover him. So we talked a bit and kicked around a very Adam-specific idea that I'm pretty excited about. And again it's overly complex, very specific, will take forever, and will probably require hand quilting... I'm so excited!!

* I have not forgotten that I've plans for another 4T quilt for another individual! But that one actually requires the game to end before I can start on it so this one is... like... an exceptionally complicated palate cleanser...

Quilt Top

You can check out more photos over at the Flickr album.

Saturday, October 3, 2015

Winding down

So I'm fast approaching the 3 month mark of being unemployed and things are winding down here. I've already begun the process of finding new work- have applied to a number of places already. Am targeting Nov. 9th for a start date. Fingers crossed that I can a company that both interests me and wants to hire me. Am never able to escape that Woody Allen joke "I'd never join a club that would allow a person like me to become a member" in terms of work though...

Yet another sunset photo

In terms of the things winding down: I'm excited that most my projects/goals/objectives of this hiatus have been met or are very near the finish line. Other than claiming I was going to do TWO quilts rather than just one (because I'm an idiot), I feel I've done an excellent job of scaling my ambitions to my expected available time. The quilt is essentially done, just needs some more superfluous stitching and a wash. The books are going to be finished come hell or high water. I've learned to cook chicken a number of ways (some of them even fast and easy!) and feel rather confident I could prepare a "meal" on the fly now after work without excessive stress or research. I've got 3 branch libraries to hit and then I'll have tackled 'em all. I had an excellent run of 5+ mile a' days there and don't feel guilty or bad that I've slipped back down to a steady 3 miles a day because I want to, you know, DO THINGS during the day and walking takes a hella' lot more time than initially anticipated.


(I dehydrated a hard boiled egg. I DO NOT ADVISE IT)

I guess the main let-down of this whole extended vacation was I failed to advance my drawing skills. I had hoped to tackle landscapes and I've made not a pinch of progress on that these 3 months (or past 10 even- it was one of my few resolutions this year). I also failed to attend any sort of fitness bootcamp nonsense thing, which I never really seriously considered but had always faintly hoped I'd do given sufficient free time. Maybe three months just wasn't "sufficient" enough, 6+ months off and I'm sure I'd get around to it...

In terms of other, just general awesome things:

  • Saw the whole blood moon eclipse thing. Happiness.
  • Went to the SF Super Hero Street Fair with company. Had a drink even! Danced with Santa. Was swept off my feet by random silver spandex man and made very happy. Good times.
  • Finally took another stab at hard crack sugar. It went better this time. I am emboldened.
  • Suko and I have not yet abandoned archery. This makes me proud of us.
  • I got a calligraphic letter from Katie in the mail, and it wasn't even a reply to something I'd sent. Just outa' the blue. So nice!
  • Enjoyed opening weekend at the Petaluma corn maze. Highly recommend it.